Fluffy Gluten-Free Biscuits 5 Ingredient Magic for Easy Mornings
Wake Up to Warm, Fluffy Goodness
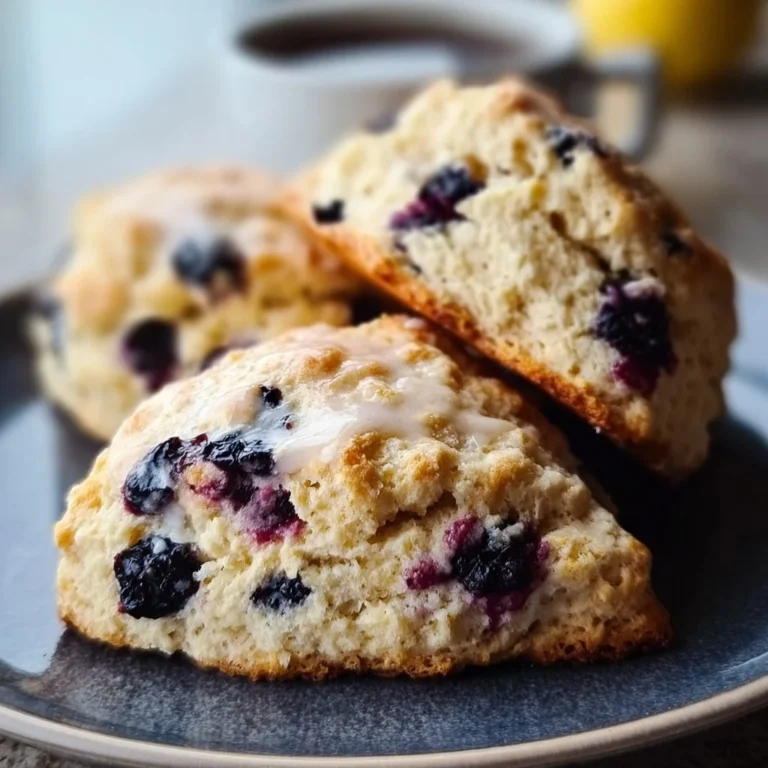
Imagine waking up to the mouthwatering aroma of freshly baked biscuits wafting through your kitchen. You know the kind — fluffy, buttery, and oh-so-comforting. Grab your apron, because we’re diving into the world of Fluffy Gluten-Free Biscuits that require just five simple ingredients! This recipe is a total game-changer for your morning routine, delivering homemade warmth without the fuss.
Why Make This Recipe
Who doesn’t love a hassle-free breakfast? Here are a few reasons why you’ll adore these biscuits:
- Quick to whip up: You can have them in the oven in under 10 minutes.
- Gluten-free: Perfect for those with dietary restrictions but still crave that biscuit goodness.
- No crazy cleanup: One bowl, one baking sheet — less time scrubbing, more time munching. 🙌
Ingredients
You don’t need fancy stuff — just these basics!
- 2 cups gluten-free flour (Choose a blend that contains xanthan gum)
- 1/4 cup cold butter (Keep it chilled until ready to use)
- 1 tbsp baking powder (Use fresh baking powder)
- 3/4 cup cold milk (Almond or oat milk works for dairy-free)
- 1/2 tsp salt (Balances sweetness and richness)
Directions
Making the Biscuits
- Preheat your oven to 425°F (220°C). Get that heat rolling!
- In a mixing bowl, combine the gluten-free flour, baking powder, and salt. Mix well!
- Cut in the cold butter until the mixture resembles coarse crumbs. Think ‘fun sandcastle’ texture.
- Stir in the cold milk until everything comes together into a nice dough.
- On a floured surface, gently knead the dough a few times before rolling it out to about 1-inch thickness.
- Cut into rounds (or just use a glass if you’re feeling rebellious) and place them on a baking sheet.
- Bake for 10-12 minutes, or until golden and oh-so-fluffy!

How to Make Fluffy Gluten-Free Biscuits 5 Ingredient Magic for Easy Mornings (Overview)
Ready for a biscuit adventure? Here’s a quick overview:
- Mix the dry ingredients: Combine your flour, baking powder, and salt like a pro.
- Add the butter: Don’t be shy; get in there and mix!
- Pour in the milk: Watch it all come together into a lovely dough.
- Shape and bake: Cut out those biscuits and pop them in the oven. Easy peasy!
Pro tip: For the fluffiest biscuits, handle the dough as little as possible. The more you knead, the tougher they can get!
How to Serve Fluffy Gluten-Free Biscuits 5 Ingredient Magic for Easy Mornings
Think toppings! Spread a dollop of homemade jam or a thick layer of butter on these golden delights. Picture this: the biscuit is warm, the jam is sweet and sticky, and your taste buds are dancing. 🌼 Pair them with a side of fresh fruit or a hot cup of coffee for that perfect morning balance.
How to Store Fluffy Gluten-Free Biscuits 5 Ingredient Magic for Easy Mornings
Got leftovers? No worries, you can store these fluffy beauties!
- In the fridge, they stay fresh for about 2-3 days.
- To freeze, wrap them tightly in plastic wrap and store in an airtight container for up to 3 months.
Reheating Tip: Pop them in the oven for a few minutes to regain that fresh-baked texture, or microwave if you’re in a hurry!
Tips to Make Fluffy Gluten-Free Biscuits 5 Ingredient Magic for Easy Mornings
Here are some insider tricks to elevate your biscuit-making game:
- Chill your ingredients: Keeping your butter and milk cold helps your biscuits rise beautifully.
- Fresh baking powder: Trust me, old baking powder is just sad — make sure yours is fresh for max fluffiness.
- Don’t overmix: Just mix until combined to keep your biscuits tender.
Variation
Want to shake things up? Here are a few delicious twists:
- Cheesy biscuits: Add a cup of your favorite shredded cheese for a savory kick.
- Herb-infused: Toss in some fresh chopped herbs like rosemary or chives for an aromatic touch.
- Sweeten it up: Stir in a tablespoon of honey or maple syrup for a touch of sweetness.
FAQs
1. Can I use regular flour instead of gluten-free?
Yes, but this recipe is tailored for gluten-free flour, which helps keep that fluffy texture!
2. Can I make these ahead of time?
Absolutely! You can prepare the dough and refrigerate it for up to 24 hours before baking.
3. How do I freeze these biscuits?
Wrap them individually or in groups, then pop them into an airtight container. Just thaw and reheat when you need them!
📌 Pin this recipe for your next cozy dinner night!

Fluffy Gluten-Free Biscuits
Ingredients
Method
- Preheat your oven to 425°F (220°C).
- In a mixing bowl, combine the gluten-free flour, baking powder, and salt. Mix well.
- Cut in the cold butter until the mixture resembles coarse crumbs.
- Stir in the cold milk until everything comes together into a dough.
- On a floured surface, gently knead the dough a few times before rolling it out to about 1-inch thickness.
- Cut into rounds and place them on a baking sheet.
- Bake for 10-12 minutes, or until golden.