Red Velvet Cheesecake Brownies
Irresistible Indulgence Awaits
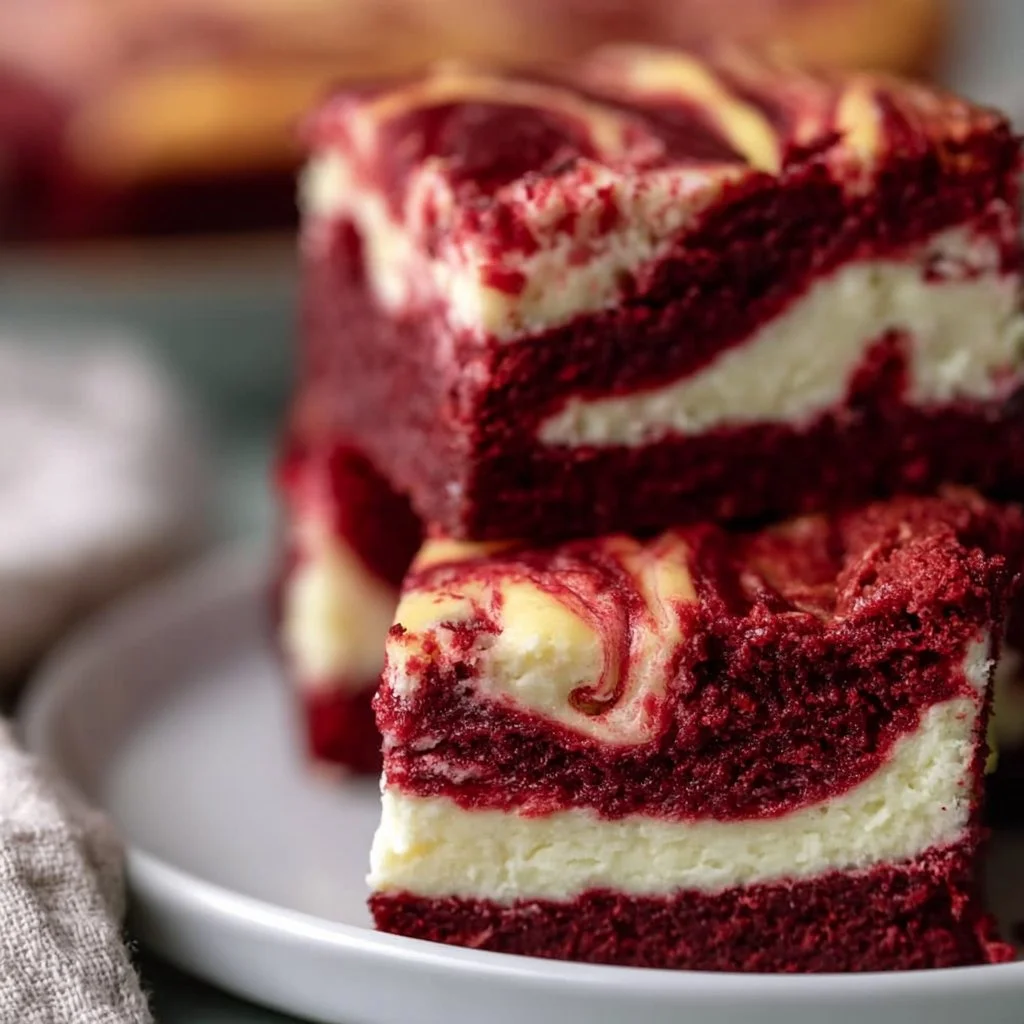
Creamy, dreamy, and decadently delicious—who can resist the allure of Red Velvet Cheesecake Brownies? These luscious treats merge the best of both worlds: the rich, cocoa-infused brownie base and the silky smooth cheesecake topping. Whether you’re seeking a show-stopping dessert for your next gathering or just a sweet pick-me-up at home, these brownies deliver a delightful experience.
Why Make This Recipe
Why should you whip up a batch of these beauties? Here are a couple of reasons to start preheating your oven:
- Easy Cleanup: One pan means less mess and fewer dishes. Who has the time for a mountain of dishes after dessert? Not me!
- Family-Friendly: Kids and adults alike will devour these brownies, proving that chocolate brings everyone together, no matter the age.
Ingredients
You don’t need fancy stuff — just these basics! Grab:
- 1/2 cup unsalted butter, melted
- 1 cup granulated sugar
- 2 large eggs, at room temperature
- 1 1/2 teaspoons red food coloring
- 2 teaspoons vanilla extract
- 1/2 teaspoon salt
- 3/4 cup all-purpose flour
- 3 Tablespoons Dutch process cocoa powder
- 8 ounces cream cheese, at room temperature
- 1 large egg, at room temperature
- 1/3 cup granulated sugar
Directions
Follow these simple steps to brownie perfection:
- Preheat your oven to 350°F (175°C) and grease a 9×9 inch baking pan.
- In a medium bowl, mix the melted butter and granulated sugar until smooth.
- Add the eggs, red food coloring, vanilla extract, and salt, and mix well.
- Slowly add the flour and cocoa powder, stirring until just combined.
- In another bowl, beat the cream cheese with one egg and 1/3 cup of sugar until smooth.
- Pour half of the brownie batter into the prepared pan, then swirl in the cream cheese mixture, followed by the remaining brownie batter.
- Use a knife to create a marbled effect.
- Bake for about 30-35 minutes, or until a toothpick inserted comes out mostly clean.
- Allow to cool before cutting into squares.

How to Make Red Velvet Cheesecake Brownies (Overview)
Ready for a quick rundown? Start by melting the butter and mix in sugar. Blend in your eggs and that fabulous red food coloring. Remember to keep an eye on stirring in that flour and cocoa—you’re looking for a smooth batter!
Then, whip up your cream cheese mixture for that delightful topping. Layer it up in your pan: brownie batter, cream cheese, and finish with the remaining brownie goo. A little marble action with the knife adds a great touch. Pop it in the oven, and let the aroma fill your kitchen. It’s pure bliss, I tell ya!
How to Serve Red Velvet Cheesecake Brownies
When it comes to serving these brownies, think decadent. They look stunning with their rich red and cream swirls. How about pairing them with a scoop of vanilla ice cream? The contrast of warm brownies and creamy ice cream is simply divine. A sprinkle of powdered sugar or a drizzle of chocolate sauce can elevate them even more. Just imagine that first bite—heavenly!
How to Store Red Velvet Cheesecake Brownies
These brownies keep well in the fridge for about 5-7 days. For longer storage, consider freezing them! They’ll last up to 3 months frozen. To enjoy again, just pop your brownies into the microwave for a few seconds—instant gooey goodness!
Tips to Make Red Velvet Cheesecake Brownies
Here are some insider tips to ensure your brownies are the best they can be:
- Use room temperature ingredients: It really helps everything blend better.
- Don’t overmix: Stir until just combined to keep those brownies soft and tender.
- Try adding chocolate chips: If you’re feeling wild, they add an extra layer of chocolatey goodness!
Variation
Feel like switching it up? Consider replacing the cream cheese with a vegan cream cheese for a plant-based twist. You could also swap in white chocolate instead of dark cocoa for a different flavor profile altogether. The world is your oyster—or brownie, in this case!
FAQs
Can I use substitutes for the eggs?
Yes! You can use flaxseed meal mixed with water or a store-bought egg replacer.
How can I make these brownies gluten-free?
Simply swap the all-purpose flour for a gluten-free flour blend. Easy peasy!
Can I add nuts to the batter?
Absolutely! Chopped pecans or walnuts will add a delightful crunch to your brownies.
📌 Pin this recipe for your next cozy dinner night!

Red Velvet Cheesecake Brownies
Ingredients
Method
- Preheat your oven to 350°F (175°C) and grease a 9x9 inch baking pan.
- In a medium bowl, mix the melted butter and granulated sugar until smooth.
- Add the eggs, red food coloring, vanilla extract, and salt, and mix well.
- Slowly add the flour and cocoa powder, stirring until just combined.
- In another bowl, beat the cream cheese with one egg and 1/3 cup of sugar until smooth.
- Pour half of the brownie batter into the prepared pan.
- Swirl in the cream cheese mixture, followed by the remaining brownie batter.
- Use a knife to create a marbled effect.
- Bake for about 30-35 minutes, or until a toothpick inserted comes out mostly clean.
- Allow to cool before cutting into squares.